

table of content
- Scenario
- Solution
- Benefits of such approach
- Step 1: Create an ASP.NET MVC project
- Step 2: Right-click on the Controllers folder
- Step 3: Now edit the highlighted section
- Step 4: Run the application
- Step 5: Now right-click on the main application project title
- Step 6: Take a backup of the SaleAreaRegistration.cs file
- Step 7: Adjust the MVCPluggableDemo’s RouteConfig.cs file
- Step 8: Set the output directory of Sale project
- Step 9: Create the Sale controller
- Step 10: Now add SaleAreaRegistration.cs file
- Step 11: Now build the solution
![]()
![]()
![]()
An overview of ASP.NET MVC
Scenario:
When a web application has many modules (or sub-applications, features) it gets larger; so the more modules you plug in your application, it becomes a bit complex to partition and maintains the code.
Solution:
The solution for the above problem is to develop application modules independently without any direct dependencies among them and also on the main application code. The development team always prefer a modular solution, in which larger modules are easily maintained overtime separately. Once each module is ready for integration, they could be then plugged into the main application with little to no adjustment of the main application.
So in short, the structure of a complex asp.net mvc application can be very easily maintained using areas. It allows us to breakdown a large complex application into several small sections called areas. These areas can have their own set of:
1. Models
2. Views
3. Controllers
4. Routes
In this article we are going to develop an ASP.NET MVC application that contain loosely coupled modules(independent to main application) and we will further plug those loosely coupled modules in the main application.
Benefits of such approach:
This approach is useful for product development. Using this approach, each module may be developed and deployed for the product separately. This helps in building different versions of the product, like basic, professional, premium, and enterprise versions. This loosely coupled modular approach enables product developers to create the separation needed to either build separate installers with the required features for each different version, a master setup which can only install defined features as per license key used during installation, or some other configuration requiring the modular separation technique.
Demo:
Here we will create a web application that contains the following modules:
• Sale
• Purchase
• Maintenance
• Marketing
• Stock
• Import
• Export
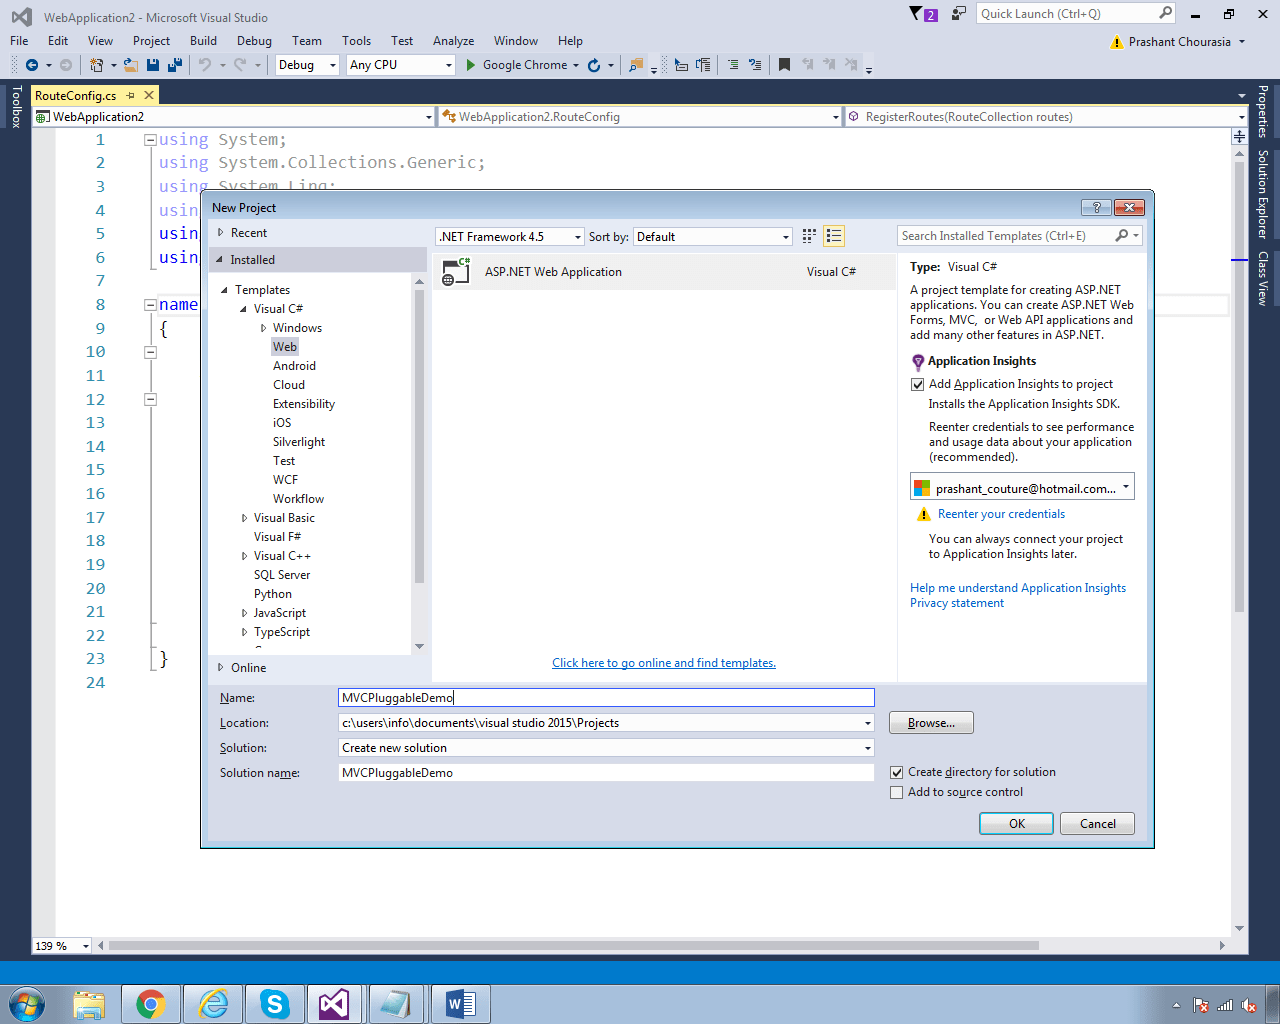
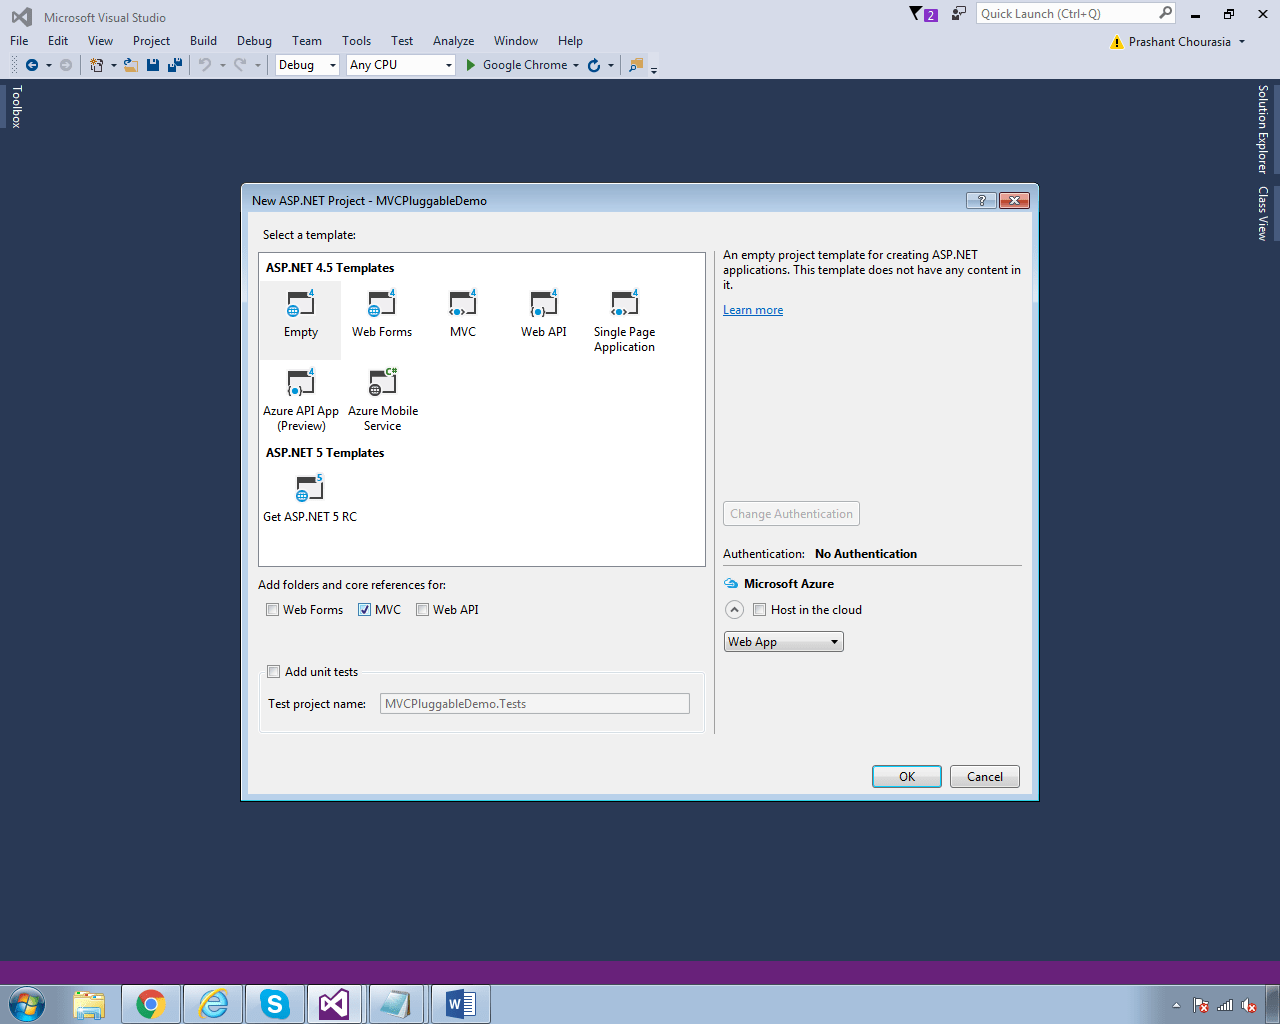
Step 1:
Open Visual Studio 2015 and create an ASP.NET MVC project as follows. Give it a meaningful name (as in my case it is MVCPluggableDemo).
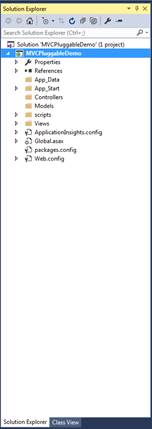
Once it’s created, your solution should look like this:
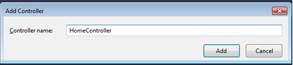
Step 2:
Right-click on the Controllers folder and select “Add -> Controller”. Give it a name HomeController, and select “Empty MVC Controller” for the template:
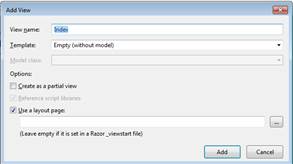
Next Right-click on the Index method of the controller and select “Add View”. Using defaults, create the Index view for HomeController to create the landing page for the application:
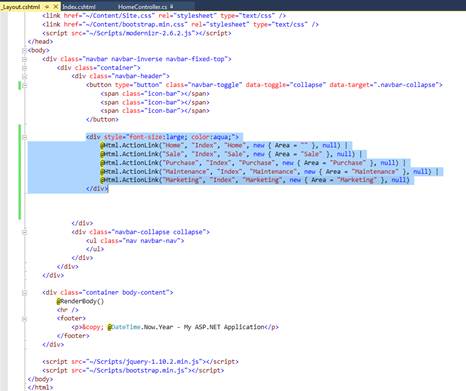
Step 3:
Now edit the highlighted section in _Layout.cshtml (under the Views\Shared folder) in order to create menu items pointing to the desired modules:
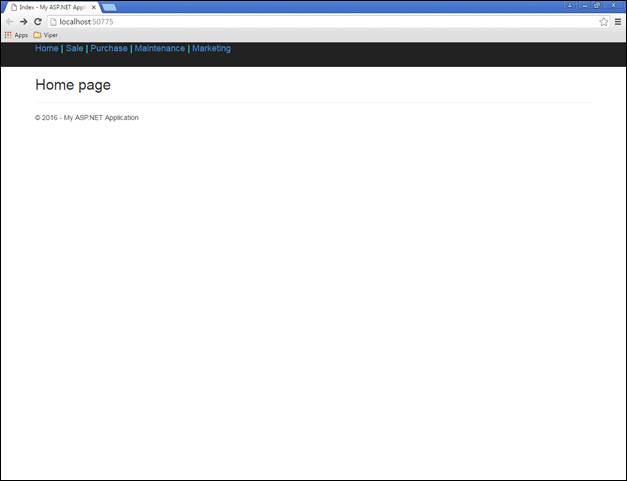
Step 4:
Run the application, you will get the output as follows:
Now we will focus on creating the separate module of our application and then plug them into our main application.
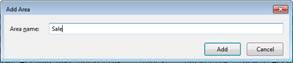
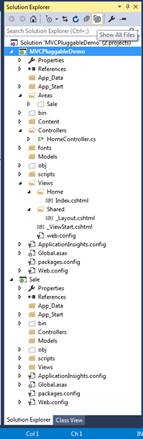
Step 5:
Now right-click on the main application project title (as in our case MVCPluggableDemo) in the Solution Explorer and select “Add->Area” from the context menu. This will create the basic folder structure for the Area framework. Specify “Sale” as Area name and click “Add”.
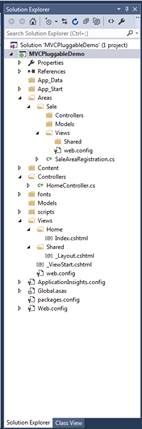
Then we have a folder solution structure that looks like as:
Step 6:
Take a backup of the SaleAreaRegistration.cs file. This file will be needed later on when we add the Sale module to the solution as a separate project.
Now remove the Sale subfolder from the Areas folder, keeping the Areas folder in place.
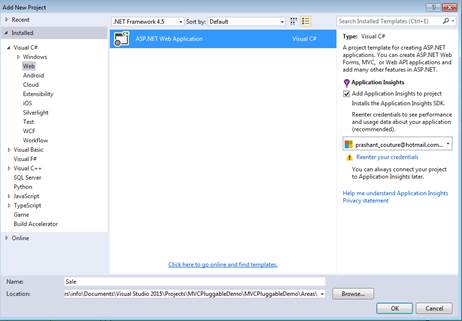
Next add the new pluggable module for “Sale”, right-click on the solution and choose “Add-> New Project”.
• Select Empty ASP.NET MVC Application
• Give the name to project as ‘Sale’
• Set Location as “…\MVCPluggableDemo\MVCPluggableDemo\Areas\”
• A new project should be created in the Areas folder we created.
After this step, the solution should look like the following:
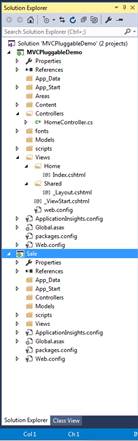
As we saved new project Sale under the Areas folder, it appears as a hidden folder under the MVCPluggableDemo/Areas folder in the Solution Explorer:
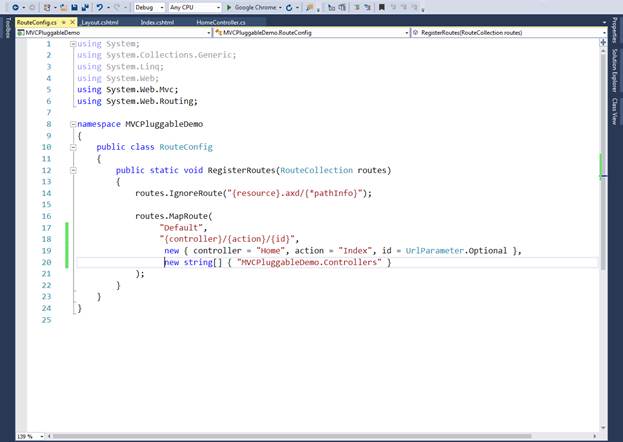
Step 7:
Adjust the MVCPluggableDemo’s RouteConfig.cs file to properly add the correct namespace overload to the routes.MapRoute() method:
Here we’ll use another overloaded version of routes.MapRoute() method which also takes the namespace of the Controller.
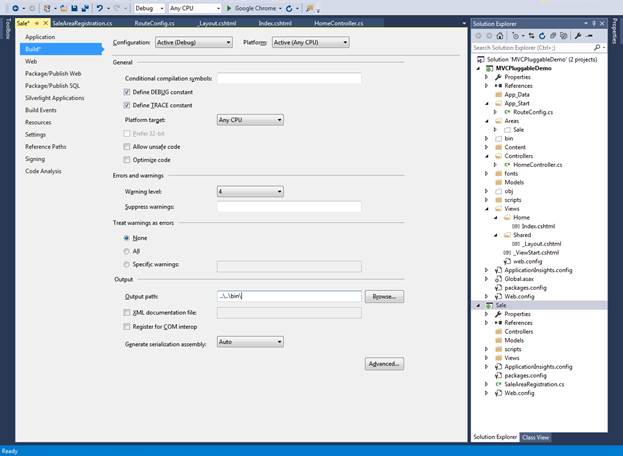
Step 8:
Set the output directory of Sale project to ..\..\bin\ so that it’s compiled DLLs are placed in the bin directory of the MVCPluggableDemo application:
Setting related to connection strings, authentication, membership, role manager, profile, and session state are going to be placed in the web.config of your root directory. To remove all these sections from the sale’s web.config.
Step 9:
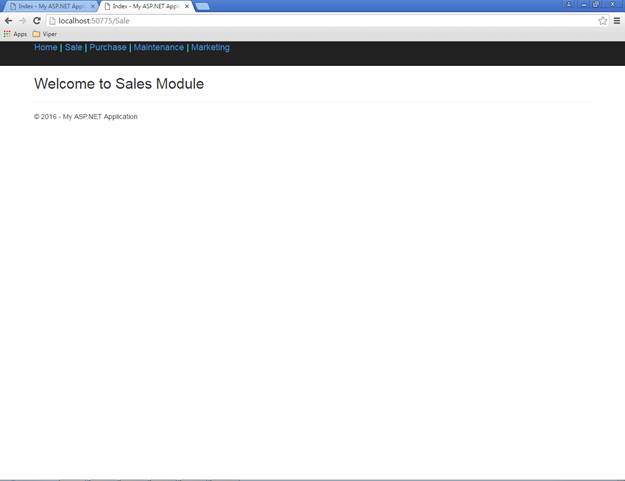
• Create the Sale controller in the Sale project.
• Create an Index view and place the content “Welcome to Sales Module” in its header.
Step 10:
Now add SaleAreaRegistration.cs file (Backup file from step 6) to the root directory of the Sale project and change its namespace to MVCPluggableDemo and use the overloaded version of context.MapRoute() method which accepts the namespace of the controller to use as follows:

Step 11:
Now build the solution and check the MVCPluggableDemo\bin folder and you will have the compiled DLLs for the Sale module there:

Step 12:
Now finally run the application and it will be working as expected.

Follow the same steps and creates other larger modules separately and plug them into your application.