Continuous Integration & Delivery (CI & CD) using Bamboo on Azure App Services
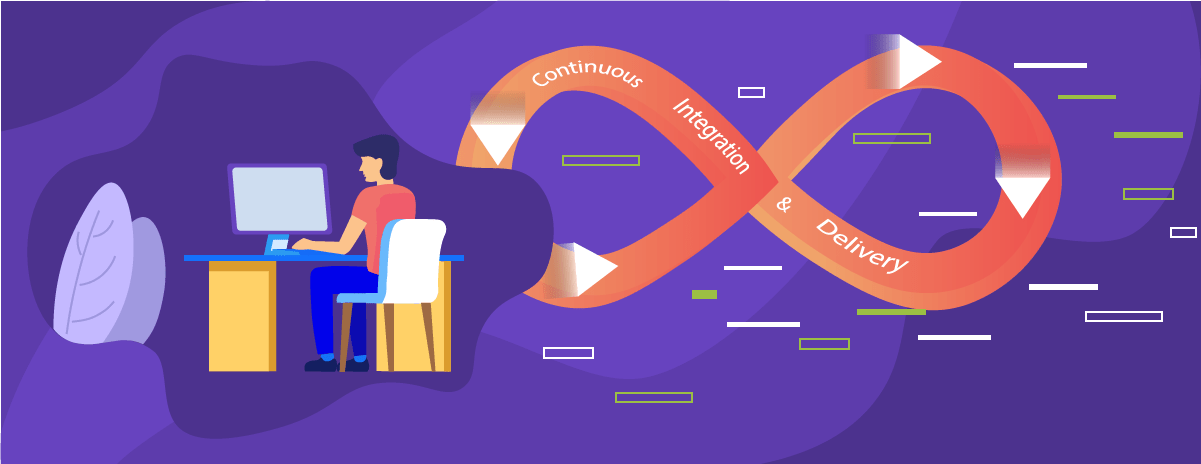
Continuous Integration (CI) :
Continuous Integration means continuously integrating the committed code into the source control repository. Each integrated code is automatically tested, testing is not the part of CI instead it is implied to.
Every time the developer commits the code to a Version Control Repository(VCS)- ( Git in my case), the committed code is integrated automatically ( The integration Tool – Bamboo) which is linked to the repository based on some tasks to check the committed source code builds successfully or not. If the build is not successful you can easily locate through the errors and rectify it and again start with the CI.
Benefits of CI :
- Reduces Risk
- Better communication.
- Reduces integration issues allowing the delivery of software faster.
- Reduces Manual Testing effort as there are self-testing builds.
- Quality Assurance.
Steps For Continuous Integration :
Bamboo is a continuous integration tool that I'll be using to perform CI .
Step 1: Create a Build Project

Step 2: Create a Plan
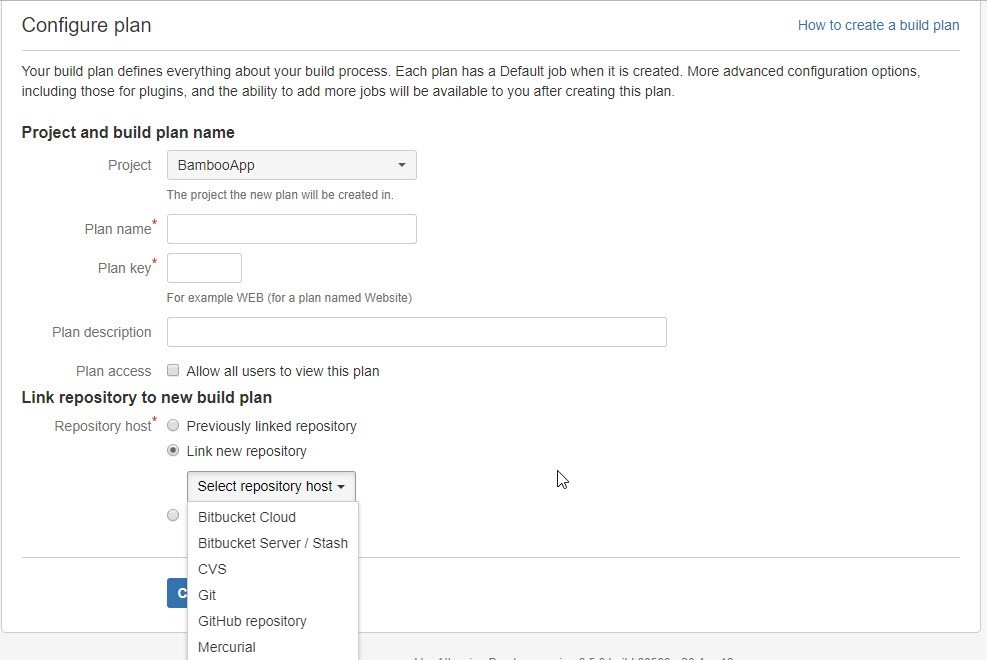
Associate your build plan with the project created above. Provide the details for the mandatory fields. Link the Build Plan with the repository where you check out the source code ( Like, Git).
Step 3: Configure Plan

Step 4: Create a task for the Build Stages
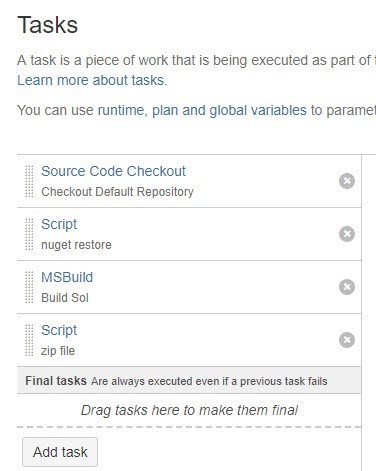
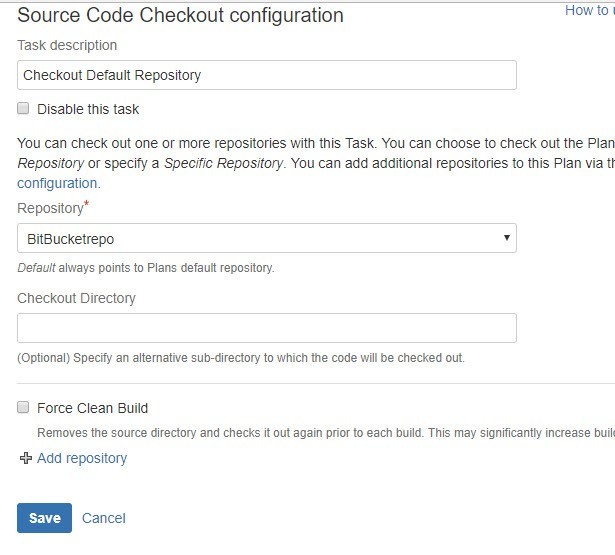
- Source Code Checkout: This task is configured to check out the source code to the Integration Server.
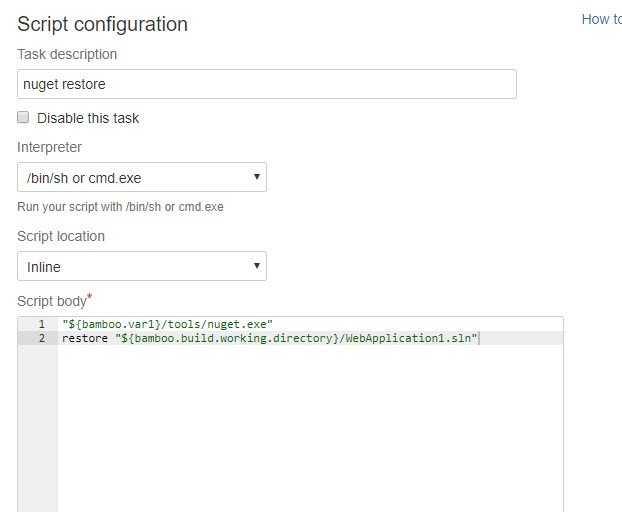
- Script Configuration: Script task to restore the nuget packages for the solution.
- MSBuild : This task will build the solution(.sln) / (.csproj) file.
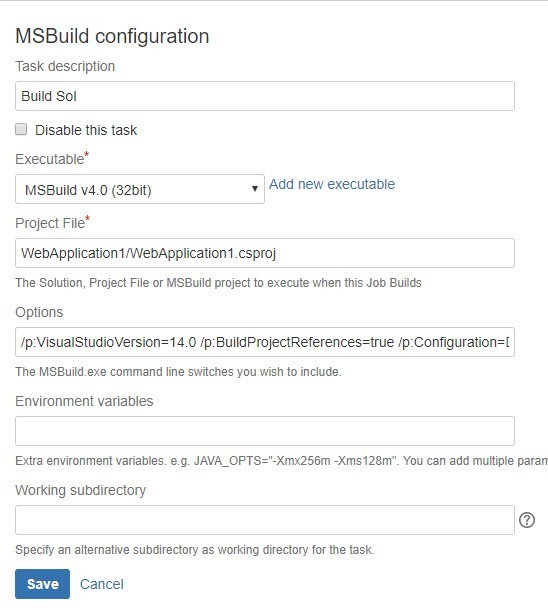
Options : /p:VisualStudioVersion=14.0 /p:BuildProjectReferences=true /p:Configuration=Debug /p:OutDir="d:/WebApp"
OutDir : It will be the path location where you want to store your published application.
VisualStudioVersion: It is the VS version that is installed on your integration server.
- Script: This task will generate the zip file of the published solution in the specified location on the server.
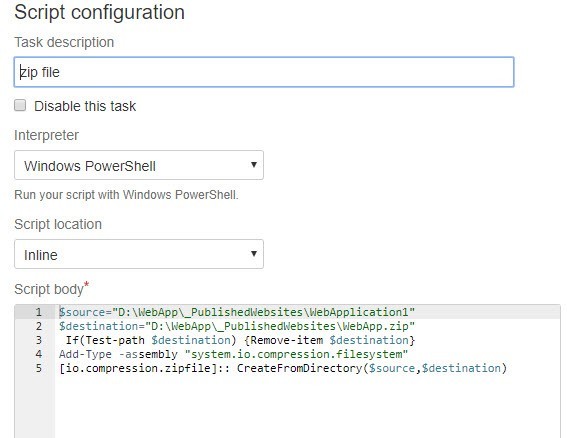
$source: Path from where the published solution will be picked to create zip.
$destination: Path where the zip file will be created.
These were a few steps to achieve a successful build for CI. If all the tasks mentioned above return success build plan is succeeded, if any of them fails build plan will be returned with the error.
Continuous Delivery (CD):
It is the practice to ensure that a rapidly committed code can safely be deployed to production . Since every change is delivered to the staging environment you have a surety that the application can be deployed to production.
Many users are confused with Continuous Delivery and Continuous Deployment. The key difference is :
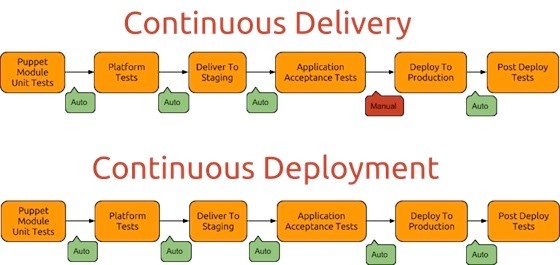
Where Continuous Delivery process for Deployment to production is manually triggered whereas Continuous Deployment process has Deployment been triggered automatically.
Steps for Continuous Delivery :
- Step 1: Create Deployment project as done above which will be linked to your build plan.
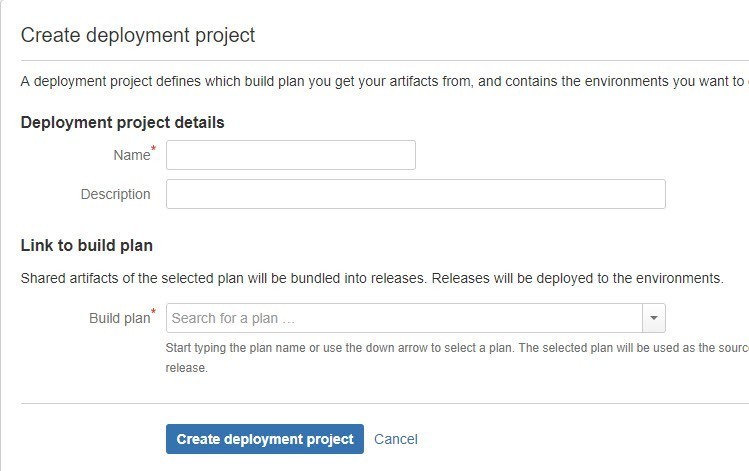
- Step 2 : Configure Environment and associate the tasks as to how you want to deploy.
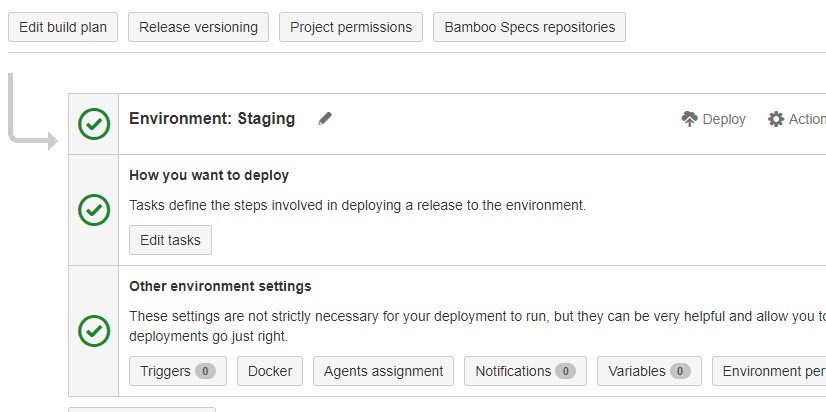
- Step 3 : Add tasks required to deploy.
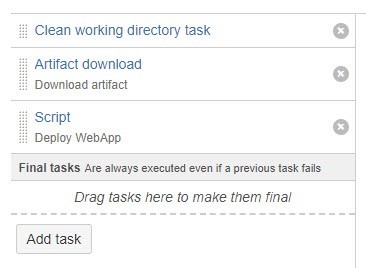
Artifact Download: Artifacts are the published zip file of the solution been created at the time of build above
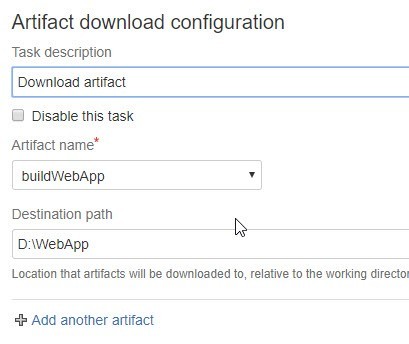
Artifact Name: We will link the artifact created at the time of build to the deployment project.
Destination path: Will be the path where you want to download your artifact. This will be the path of the server.
Script: A deployable script task to deploy your application to Azure Web Services.
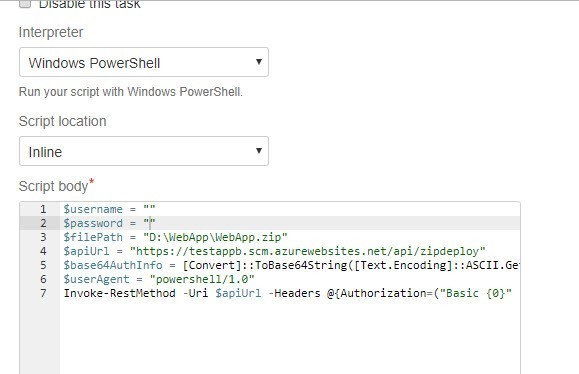
$username – $password : Azure app service username & password.
$filepath: Path where your zip file is located.
$apiUrl : "https: // .scm.azurewebsites.net/API/zipdeploy
As soon as all the deployment tasks are been configured you can deploy your app to azure. If all the deployment tasks are successful your app will be deployed successfully.
These were some of the steps to be followed for automated integration and Continuous Delivery as a result of successful Build and Deployment.[number]


